Lesson 5: Set Up AEM to Use the Worker
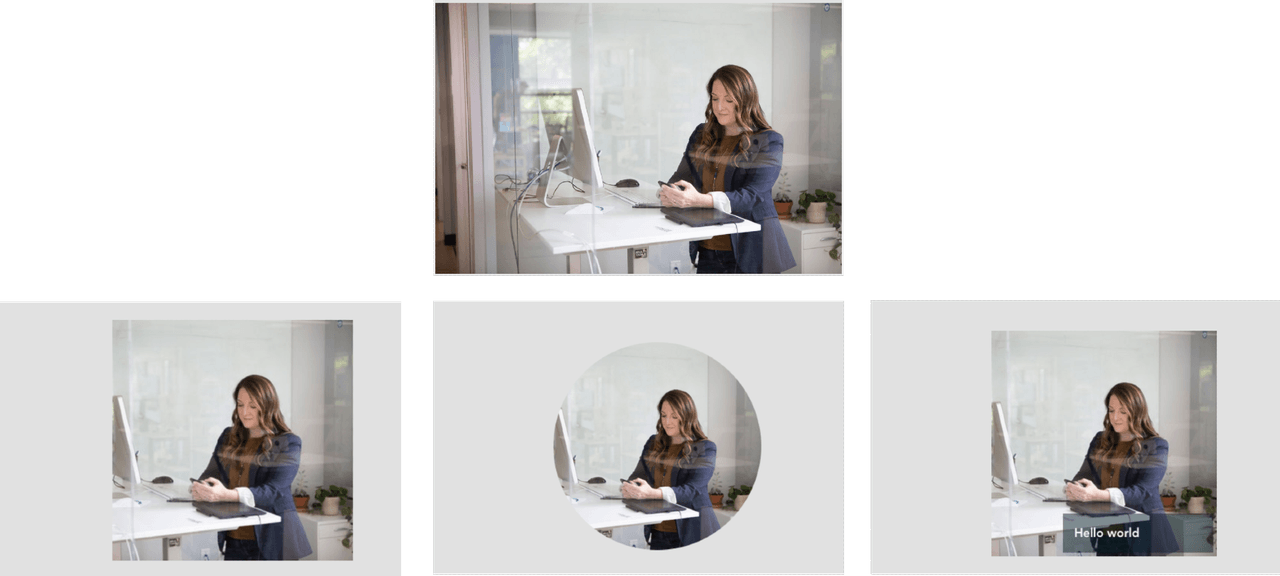
Go to your AEM Cloud instance and open Tools -> Assets -> Processing Profiles. Then create a new processing profile, for example My Worker test profile. On the Custom tab, configure your renditions to use your worker, as shown here:

These three renditions were created using imgix configuration parameters - we don't need to escape JSON, since it's used in AEM:
Crop an image to 300x300 px around faces if detected, or around busy sections of the image (entropy):
Copied to your clipboard{"fit": "crop","crop": "faces,entropy","w": 300,"h": 300}Apply an ellipse mask around the cropped area in the previous rendition.
Copied to your clipboard{"fit": "crop","crop": "faces,entropy","w": 300,"h": 300,"fm": "png","mask": "ellipse"}Add a text watermark to the rendition in the previous image:
Copied to your clipboard{"h": 300,"w": 300,"fit": "crop","crop": "faces,entropy","mark": "https://assets.imgix.net/~text?w=200&txt-color=fff&txt=Hello+world&txt-size=16&txt-lead=0&txt-pad=15&bg=80002228&txt-font=Avenir-Heavy"}
Finally, apply the profile to DAM folder:

Now you can upload images to the folder and observe results on the asset details page.

Photo by LinkedIn Sales Navigator on Unsplash.


